
Mastering the Art of French Macarons: A Comprehensive Guide for Beginners
French macarons, those delicate and colorful meringue-based cookies, often seem like an intimidating feat for home bakers. Their smooth, glossy shells, perfect “feet,” and creamy fillings whisper tales of culinary expertise. But fear not! This guide breaks down the process into manageable steps, offering practical tips and educational insights to help you conquer the macaron and impress your friends and family. We’ll explore the science behind successful macarons, troubleshoot common problems, and provide a foolproof recipe to get you started. Get ready to embark on a delicious journey into the world of French pastry!

Understanding the Macaron Mystique: What Makes Them So Special?
Before we dive into the recipe, let’s understand what makes macarons so unique and why they require a little extra attention. Unlike regular cookies, macarons rely on a precise balance of ingredients and techniques to achieve their signature texture and appearance.
The key components of a macaron are:
- Almond Flour: Finely ground almonds provide the structure and nutty flavor. It’s crucial to use blanched almond flour, as the skins can create a grainy texture.
- Icing Sugar: Adds sweetness and helps create the smooth shell.
- Egg Whites: Whipped into a meringue, providing the airy lift and delicate structure. The age of the egg whites plays a crucial role (more on this later!).
- Granulated Sugar: Stabilizes the meringue and adds sweetness.
- Food Coloring (Optional): Gel food coloring is recommended for vibrant colors without adding excess liquid.
- French Method: This method involves whipping raw egg whites with granulated sugar until stiff peaks form. It’s considered simpler and more accessible for beginners.
- Italian Method: This method involves cooking a sugar syrup and pouring it over the egg whites while whipping. This creates a more stable and glossy meringue, often favored by professional bakers.
- Kitchen Scale: Accuracy is paramount in macaron making. A kitchen scale is essential for measuring ingredients precisely.
- Stand Mixer or Hand Mixer: Whipping the meringue requires a powerful mixer. A stand mixer is ideal, but a hand mixer can also work.
- Sifter: To ensure smooth macaron shells, sift the almond flour and icing sugar to remove any lumps.
- Piping Bag: For piping the macaron batter onto baking sheets.
- Round Piping Tip: A small, round piping tip (about ½ inch in diameter) creates uniform macaron shells.
- Silicone Baking Mat or Parchment Paper: To prevent the macarons from sticking to the baking sheet. Silicone mats are reusable and provide a consistent baking surface.
- Baking Sheets: Choose baking sheets that are flat and even for consistent baking.
- Toothpick or Skewer: To pop any air bubbles in the piped macaron batter.
- 100g almond flour, finely ground and blanched
- 100g icing sugar
- 50g egg whites, aged (see explanation below)
- 50g granulated sugar
- Gel food coloring (optional)
- Prepare the Almond Flour Mixture: In a large bowl, sift together the almond flour and icing sugar. Discard any large pieces that don’t pass through the sifter. This step is crucial for achieving smooth macaron shells.
- Internal Link Suggestion: Link to a guide on different types of flour and their uses in baking, using “types of flour” as anchor text.
- Age the Egg Whites: Separate the egg whites from the yolks a day or two in advance. Store the egg whites in an airtight container in the refrigerator. Aging the egg whites reduces their moisture content, resulting in a more stable meringue.
- Key Takeaway: Aging egg whites is crucial for macaron success.
- Whip the Meringue: In a clean, grease-free bowl, beat the egg whites with a mixer until soft peaks form. Gradually add the granulated sugar, one tablespoon at a time, while continuing to beat. Continue beating until stiff, glossy peaks form. The meringue should be firm enough to hold its shape.
- Transition Sentence: Now that the meringue is ready, let’s combine it with the almond flour mixture.
- Add Food Coloring (Optional): If using food coloring, add a few drops to the meringue and gently fold it in until evenly distributed. Be careful not to overmix.
- Macaronage: This is the most crucial step! Gradually add the almond flour mixture to the meringue, folding it in gently with a spatula. The goal is to deflate the meringue slightly while still maintaining its airy texture. The batter should flow slowly and smoothly off the spatula in a ribbon-like consistency. This is often described as a “lava-like” consistency.
- Pro Tip: The macaronage process requires practice. It’s better to undermix than overmix.
- Pipe the Macarons: Transfer the batter to a piping bag fitted with a round piping tip. Pipe circles about 1.5 inches in diameter onto a silicone baking mat or parchment paper-lined baking sheet. Leave about 1 inch of space between each macaron.
- Tap the Baking Sheet: Gently tap the baking sheet on the counter several times to release any trapped air bubbles. Use a toothpick or skewer to pop any remaining bubbles.
- Rest the Macarons: Let the piped macarons rest at room temperature for 30-60 minutes, or until a skin forms on the surface. This is crucial for the development of the “feet.” The surface should be dry to the touch and not sticky.
- Warning: Do not skip the resting step!
- Preheat the Oven: Preheat the oven to 300°F (150°C).
- Bake the Macarons: Bake for 12-15 minutes, or until the “feet” have formed and the macarons are set. The baking time may vary depending on your oven.
- Cool Completely: Let the macarons cool completely on the baking sheet before removing them.
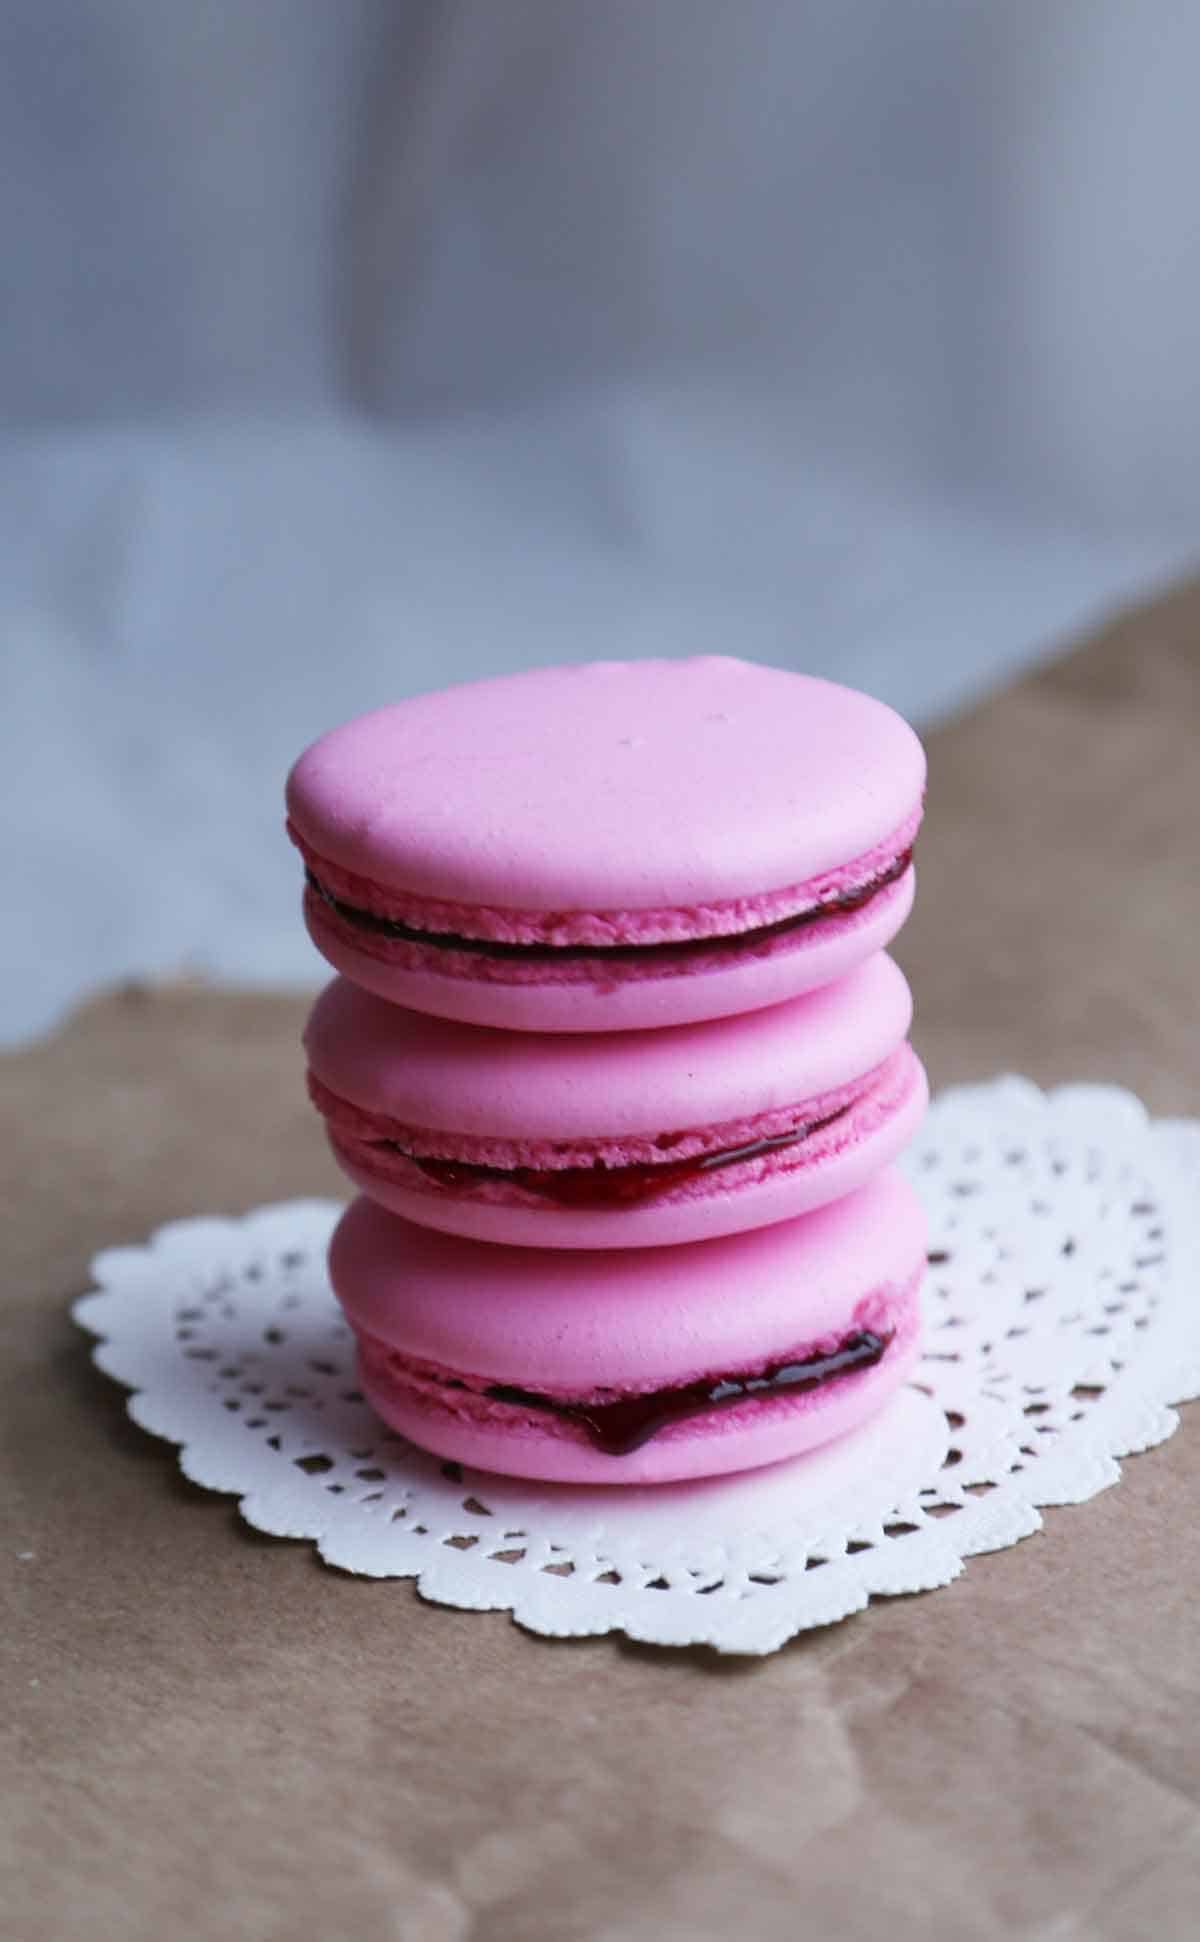
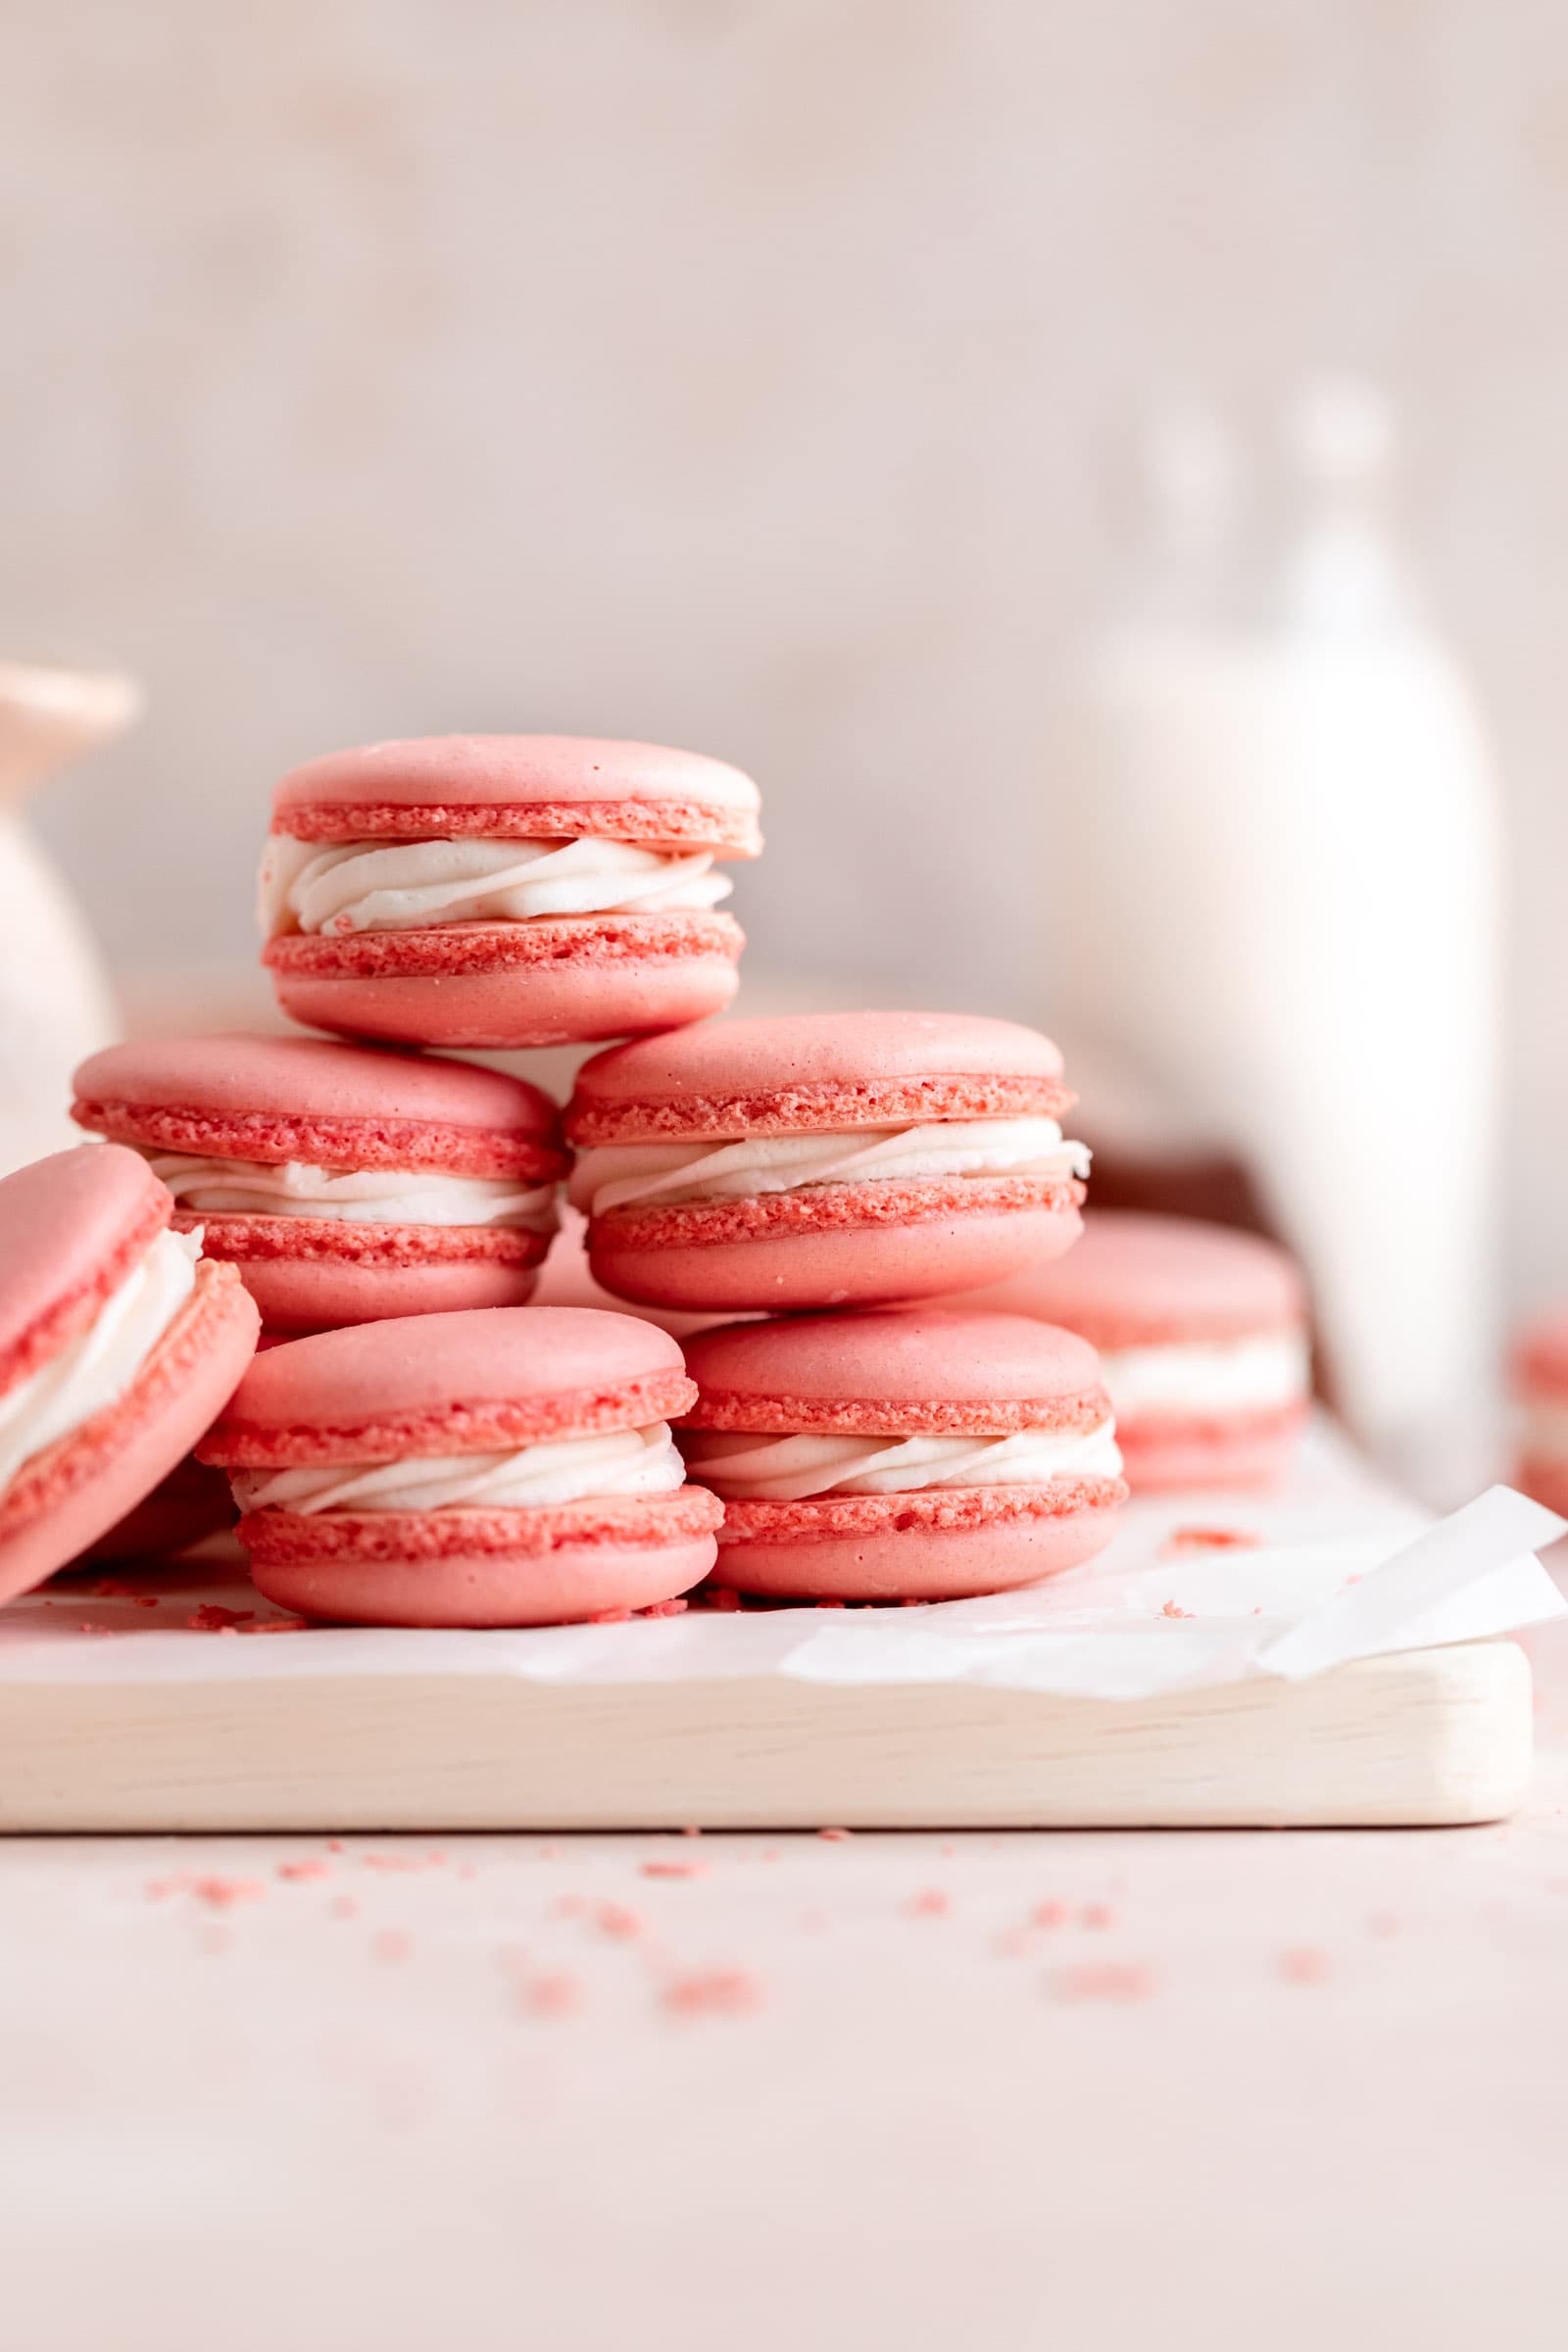
- Assemble the Macarons: Pair the macaron shells according to size and shape. Fill the macarons with your favorite filling, such as buttercream, ganache, or jam.
- Internal Link Suggestion: Link to a recipe for chocolate ganache filling, using “chocolate ganache” as anchor text.
- Refrigerate: Refrigerate the assembled macarons for at least 24 hours to allow the flavors to meld and the texture to soften.
- Cracked Shells: This can be caused by overmixing the batter, baking at too high of a temperature, or not resting the macarons long enough.
- No Feet: This can be caused by undermixing the batter, baking at too low of a temperature, or the oven not being hot enough.
- Hollow Shells: This can be caused by overmixing the batter or baking at too high of a temperature.
- Uneven Feet: This can be caused by uneven oven temperature or uneven piping.
- Macarons Sticking to the Baking Sheet: This can be caused by not using a silicone baking mat or parchment paper, or by not letting the macarons cool completely before removing them.
- Buttercream: Classic and versatile, buttercream can be flavored with vanilla, chocolate, coffee, or fruit purees.
- Ganache: A rich and decadent filling made with chocolate and cream.
- Jam: A simple and fruity filling that complements the almond flavor of the macarons.
- Cream Cheese Frosting: A tangy and slightly sweet filling that pairs well with citrus or berry flavors.
- Salted Caramel: A sweet and salty filling that adds a sophisticated touch.
- Use a Kitchen Scale: Accuracy is key!
- Age Your Egg Whites: This helps create a more stable meringue.
- Sift Your Almond Flour and Icing Sugar: This ensures smooth macaron shells.
- Don’t Overmix the Batter: Overmixing can lead to cracked shells and hollows.
- Rest Your Macarons: This is crucial for the development of the “feet.”
- Bake at the Right Temperature: Oven temperature is crucial for success.
- Let the Macarons Cool Completely: Before removing them from the baking sheet.
- Practice Makes Perfect: Don’t be discouraged if your first batch isn’t perfect. Keep practicing, and you’ll eventually master the art of macaron making.
- External Link Suggestion: Link to a guide on oven calibration, using “oven calibration” as anchor text.
- Call to Action: Sign up for our newsletter to receive more baking tips and recipes!
The magic happens when these ingredients are combined and baked. The meringue provides the lift, while the almond flour and sugar create the structure. During baking, the “feet” form as the air escapes from the bottom of the macaron, creating a characteristic frilly edge.
The Italian vs. French Method: Choosing Your Macaron Adventure
There are two primary methods for making macarons: the French method and the Italian method. While both achieve similar results, they differ in their meringue-making process.
For this guide, we’ll focus on the French method due to its simplicity and suitability for home bakers. Once you’ve mastered the French method, you can explore the Italian method for a more advanced challenge.

Essential Equipment: Setting Yourself Up for Success
Having the right equipment can make a significant difference in your macaron journey. Here’s a list of essential tools:
The Foolproof French Macaron Recipe: A Step-by-Step Guide
Now, let’s get baking! This recipe is designed for beginners and provides clear instructions for each step.
Yields: Approximately 24 macarons (48 shells)
Prep Time: 30 minutes
Resting Time: 30-60 minutes
Bake Time: 12-15 minutes
Ingredients:
Instructions:
Troubleshooting Common Macaron Problems: A Baker’s Survival Guide
Even with the most precise recipe, macarons can sometimes be temperamental. Here are some common problems and how to fix them:
Filling Ideas: Unleash Your Creativity
The filling is where you can truly let your creativity shine! Here are some popular macaron filling ideas:
Tips for Success: Mastering the Macaron
Here are some additional tips to help you master the art of macaron making:
Storing Your Macarons: Keeping Them Fresh
Macarons are best enjoyed within a few days of being made. Store them in an airtight container in the refrigerator for up to 5 days. You can also freeze macarons for up to 2 months. Thaw them in the refrigerator before serving.
Conclusion: Your Macaron Journey Begins Now!
Making French macarons may seem daunting at first, but with the right recipe, techniques, and a little patience, you can create these beautiful and delicious treats at home. Remember to focus on accuracy, pay attention to detail, and don’t be afraid to experiment with different flavors and fillings. So, gather your ingredients, preheat your oven, and embark on your macaron adventure! Happy baking!


0 Comments