
Mastering the Art of French Macarons: A Beginner’s Guide
Have you ever gazed longingly at those delicate, colorful French macarons in a bakery window, wondering if you could ever create such masterpieces yourself? The good news is, with a little patience, the right guidance, and a dash of encouragement, you absolutely can! This guide will walk you through the process of making French macarons from scratch, offering tips, tricks, and troubleshooting advice along the way. So, let’s put on our aprons and embark on this exciting baking adventure together!
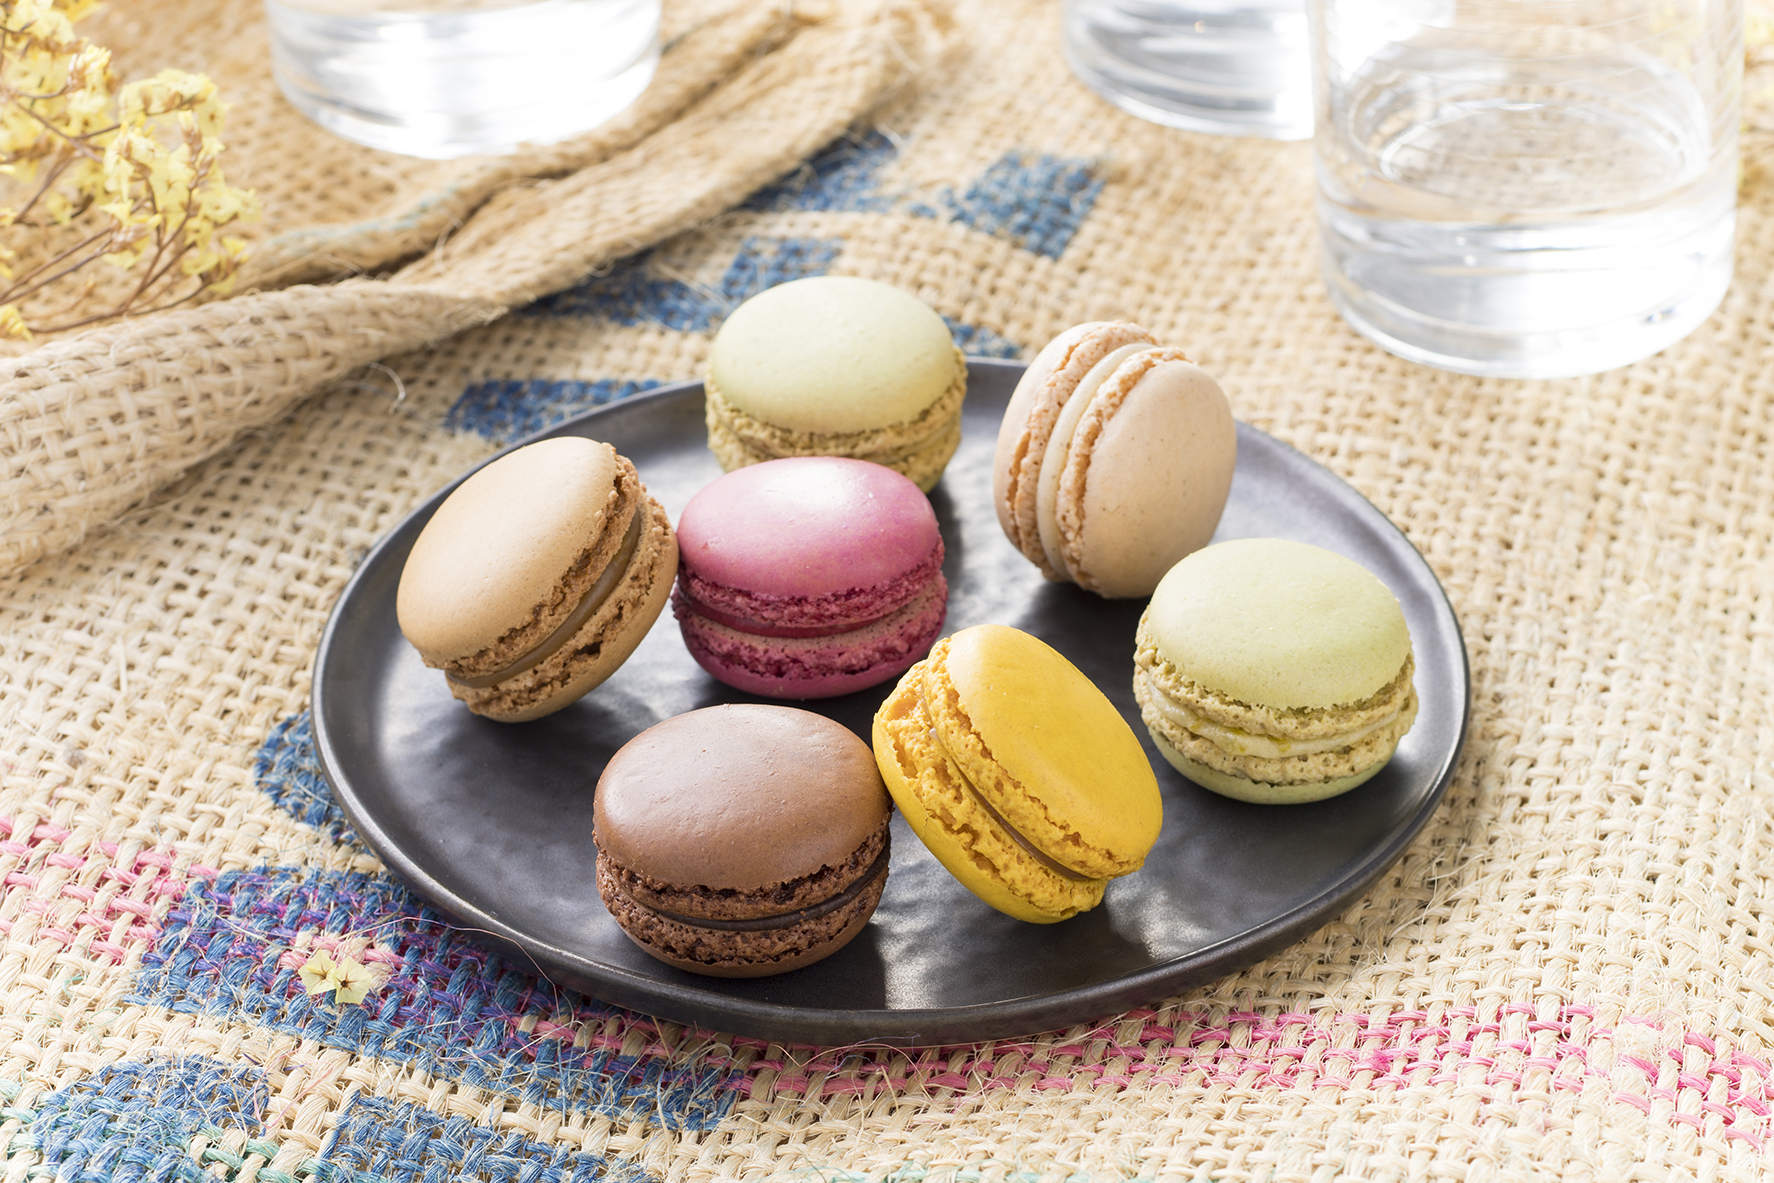
Understanding the Allure of French Macarons
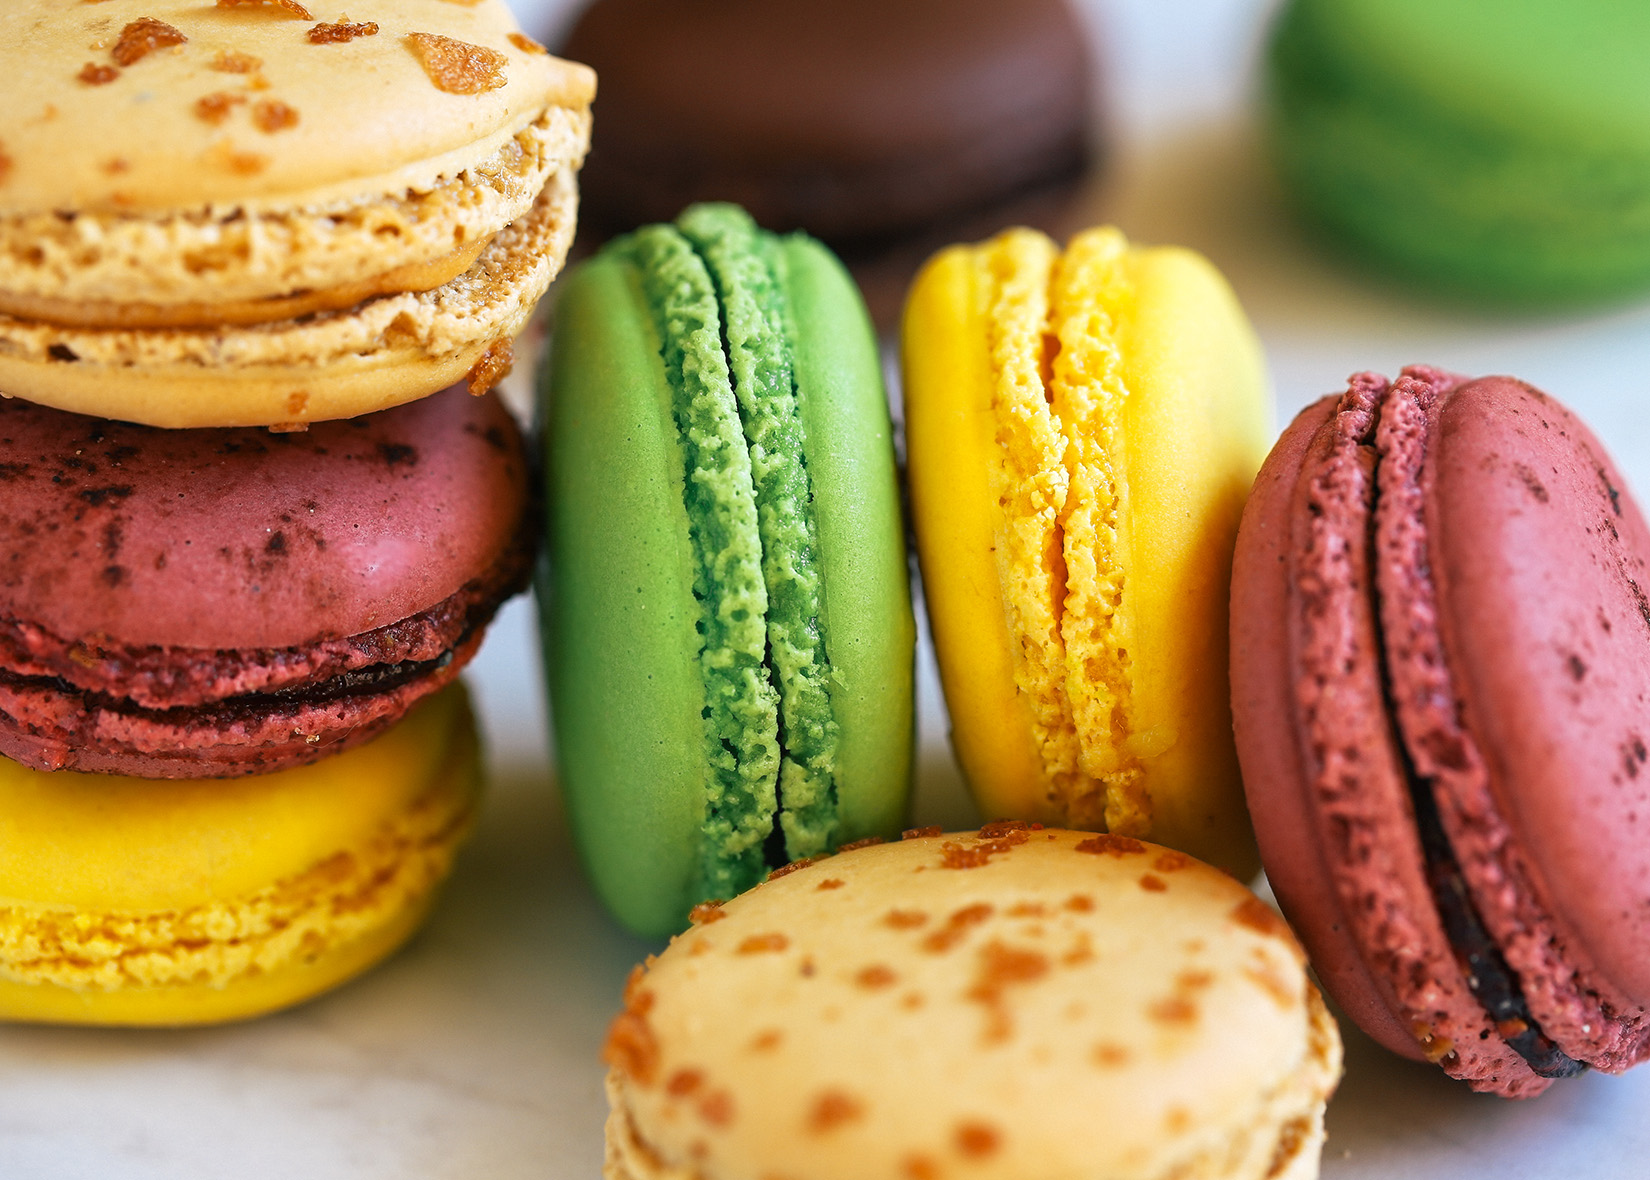
French macarons are more than just cookies; they’re a symbol of elegance and culinary artistry. These meringue-based confections, known for their smooth, glossy shells and delicate “feet,” are sandwiched together with a creamy filling, creating a delightful textural and flavor experience. While they might seem intimidating at first, breaking down the process into manageable steps makes them achievable for any home baker.
Why Are Macarons So Popular?
* Exquisite Texture: The combination of a crisp shell and a chewy interior is simply irresistible.
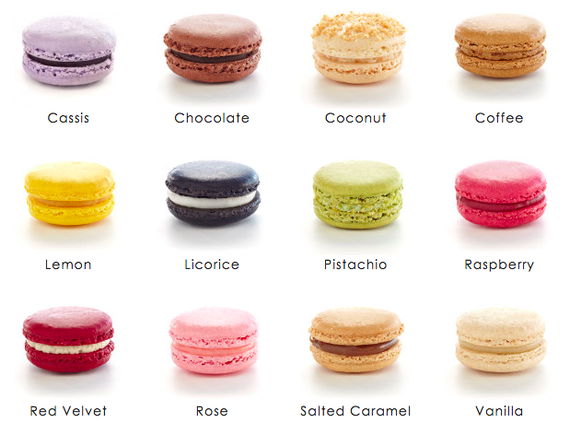
- Versatile Flavors: From classic vanilla and chocolate to exotic rose and pistachio, the flavor possibilities are endless.
- Visual Appeal: Their vibrant colors and perfect symmetry make them a feast for the eyes.
- Perfect for Gifting: Macarons make elegant and thoughtful gifts for any occasion.
- Kitchen Scale: Accuracy is key when making macarons. A digital kitchen scale is essential for measuring ingredients precisely.
- Stand Mixer or Hand Mixer: A mixer is needed to whip the meringue to stiff peaks.
- Sifter: Sifting the almond flour and powdered sugar ensures a smooth batter.
- Rubber Spatula: Used for folding the ingredients together gently.
- Piping Bag and Round Piping Tip: Essential for creating uniform macaron shells.
- Parchment Paper or Silicone Baking Mat: Provides a non-stick surface for baking.
- Templates: Using a template ensures consistent macaron sizes. You can easily find these online and print them out.
- Oven Thermometer: Ovens can be temperamental, so an oven thermometer helps ensure accurate baking temperatures.
- Almond Flour: Use finely ground almond flour, also known as almond meal. Make sure it’s blanched (skins removed) for the best results.
- Powdered Sugar: Also known as confectioners’ sugar, it adds sweetness and structure to the macaron shells.
- Granulated Sugar: Used to create the meringue.
- Egg Whites: Aged egg whites are preferred for a more stable meringue.
- Cream of Tartar (Optional): Helps stabilize the meringue.
- Gel Food Coloring: Gel food coloring provides vibrant colors without adding excess liquid to the batter.
- Filling of Your Choice: Options include buttercream, ganache, jam, or curd.
- Discard Large Particles: If you have any large particles left in the sifter, discard them. These can affect the texture of your macarons.
- Set Aside: Once sifted, set the almond flour mixture aside.
- Bring to Room Temperature: Before whipping, bring the egg whites to room temperature. This will help them whip up to a greater volume.
- Start Whipping: In the bowl of your stand mixer (or using a hand mixer), begin whipping the egg whites on medium speed.
- Add Cream of Tartar (Optional): Once the egg whites become foamy, add the cream of tartar (if using). This helps to stabilize the meringue.
- Gradually Add Sugar: Slowly add the granulated sugar, a tablespoon at a time, while continuing to whip the egg whites.
- Whip to Stiff Peaks: Continue whipping until the meringue forms stiff, glossy peaks. This means that when you lift the whisk, the meringue should hold its shape and not droop.
- Add Gel Food Coloring: If using, add a few drops of gel food coloring to the meringue and mix until evenly distributed. Be careful not to overmix.
- Fold Gently: Using a rubber spatula, gently fold the dry ingredients into the meringue. The key here is to not overmix.
- Achieve the Right Consistency: Continue folding until the batter reaches a lava-like consistency. This is known as the “macaronage.” To test the consistency, lift the spatula and let the batter fall back into the bowl. It should flow slowly and smoothly, and the ribbon should disappear back into the batter within 20-30 seconds.
- Avoid Overmixing: Overmixing will result in a runny batter that spreads too much during baking. Undermixing will result in macarons with a bumpy surface.
- Fill Piping Bag: Transfer the macaron batter to the piping bag.
- Pipe onto Baking Sheet: Place a template under a sheet of parchment paper or a silicone baking mat. Pipe the macaron batter onto the prepared baking sheet, using the template as a guide to create uniform circles.
- Tap the Baking Sheet: After piping, firmly tap the baking sheet on the counter several times. This helps to release any air bubbles and create a smooth surface.
- Test for Skin Formation: To test if the skin has formed, gently touch the surface of a macaron. If it feels dry and doesn’t stick to your finger, it’s ready to bake.
- Why is resting important? This step is crucial for the formation of the signature “feet” on the macarons.
- Bake Macarons: Bake the macarons for 12-15 minutes, depending on your oven.
- Check for Feet: The “feet” should start to form after about 5-7 minutes.
- Adjust Baking Time: If the macarons are browning too quickly, lower the oven temperature slightly.
- Cool Completely: Once baked, remove the macarons from the oven and let them cool completely on the baking sheet before removing them.
- Pipe Filling: Transfer the filling to a piping bag fitted with a round piping tip.
- Match Macaron Shells: Match macaron shells of similar size and shape.
- Fill Macarons: Pipe a small amount of filling onto the flat side of one macaron shell.
- Sandwich Together: Gently sandwich another macaron shell on top of the filling.
- Refrigerate: Refrigerate the assembled macarons for at least 24 hours before serving. This allows the flavors to meld together and the texture to improve.
- Cracked Shells:
- Cause: Oven temperature too high, not enough resting time, or too much air in the batter.
- Solution: Lower the oven temperature, ensure the macarons rest long enough to form a skin, and tap the baking sheet firmly to release air bubbles.
- No Feet:
- Cause: Not enough resting time, oven temperature too low, or overmixed batter.
- Solution: Allow the macarons to rest longer, increase the oven temperature slightly, and avoid overmixing the batter.
- Hollow Shells:
- Cause: Oven temperature too high, uneven oven temperature, or overmixed batter.
- Solution: Lower the oven temperature, ensure even oven temperature, and avoid overmixing the batter.
- Bumpy Surface:
- Cause: Undermixed batter, or coarse almond flour.
- Solution: Mix the batter a little more, and ensure you are using finely ground almond flour. Sifting multiple times can also help.
- Macarons are too sticky:
- Cause: Macarons were not baked long enough, or the oven temperature was too low.
- Solution: Increase the baking time slightly, ensuring the macarons are baked thoroughly, and check your oven temperature with an oven thermometer.
- Classic Flavors:
- Vanilla Bean: Add vanilla bean paste to the meringue and fill with vanilla buttercream.
- Chocolate: Add cocoa powder to the almond flour mixture and fill with chocolate ganache.
- Coffee: Add instant coffee powder to the almond flour mixture and fill with coffee buttercream.
- Fruity Flavors:
- Raspberry: Add freeze-dried raspberry powder to the almond flour mixture and fill with raspberry jam.
- Lemon: Add lemon zest to the almond flour mixture and fill with lemon curd.
- Passion Fruit: Fill with passion fruit buttercream or curd.
- Nutty Flavors:
- Pistachio: Add pistachio paste to the meringue and fill with pistachio buttercream.
- Almond: Add almond extract to the meringue and fill with almond buttercream.
- Hazelnut: Add hazelnut flour to the almond flour mixture and fill with Nutella.
- Unique Flavors:
- Rose: Add rose water to the meringue and fill with rose buttercream.
- Lavender: Infuse milk with lavender and use it to make a lavender buttercream.
- Salted Caramel: Fill with salted caramel sauce or salted caramel buttercream.
- Refrigerate Assembled Macarons: Store assembled macarons in an airtight container in the refrigerator for up to 5 days.
- Freeze Unfilled Macaron Shells: Unfilled macaron shells can be frozen for up to 2 months. Thaw them at room temperature before filling.
- Bring to Room Temperature Before Serving: Allow the macarons to come to room temperature for about 30 minutes before serving for the best flavor and texture.

Gathering Your Essential Macaron-Making Tools
Before we dive into the recipe, let’s make sure you have all the necessary tools and equipment. Having the right tools will not only make the process easier but also increase your chances of success.
The Key Ingredients for Perfect Macarons
The quality of your ingredients matters, so choose the best you can find. Here’s a breakdown of what you’ll need:

Step-by-Step Guide to Making French Macarons
Now, let’s get to the heart of the matter: the macaron-making process itself. Don’t be discouraged if your first batch isn’t perfect; practice makes perfect!
Step 1: Preparing the Almond Flour Mixture
1. Sift Together: In a large bowl, sift together the almond flour and powdered sugar. This step is crucial for removing any lumps and ensuring a smooth batter.
Step 2: Whipping the Meringue
1. Age the Egg Whites: Separate the egg whites from the yolks a day or two in advance and store them in an airtight container in the refrigerator. This helps to reduce the moisture content and create a more stable meringue.
Step 3: The Macaronage (Folding the Batter)
1. Add Dry Ingredients to Meringue: Gradually add the sifted almond flour mixture to the meringue, in three additions.
Step 4: Piping the Macarons
1. Prepare Piping Bag: Fit a piping bag with a round piping tip.
Step 5: Resting the Macarons (The Croûtage)
1. Let Macarons Rest: Allow the piped macarons to rest at room temperature for 30-60 minutes, or until a skin forms on the surface. This is known as the “croûtage.”
Step 6: Baking the Macarons
1. Preheat Oven: Preheat your oven to 300°F (150°C). An oven thermometer is highly recommended to ensure accurate temperature.
Step 7: Filling and Assembling the Macarons
1. Prepare Filling: Prepare your desired filling, such as buttercream, ganache, jam, or curd.
Troubleshooting Common Macaron Problems
Even with the best instructions, things can sometimes go wrong. Here’s a guide to troubleshooting common macaron problems:
Flavor Variations to Spark Your Creativity
Once you’ve mastered the basic macaron recipe, the fun really begins! Experiment with different flavors and fillings to create your own signature macarons.
Storing Your Macarons for Optimal Freshness
Proper storage is essential for maintaining the quality and freshness of your macarons.
Conclusion: Embrace the Macaron Journey!
Making French macarons can be a rewarding and enjoyable experience. While it may take some practice to perfect your technique, don’t be discouraged by initial setbacks. Embrace the learning process, experiment with different flavors, and most importantly, have fun! With a little patience and perseverance, you’ll be creating beautiful and delicious macarons that will impress your friends and family. So, go ahead and give it a try – your macaron adventure awaits!
Key Takeaway: Practice makes perfect! Don’t give up if your first batch isn’t perfect. Keep experimenting and refining your technique.
Call to Action: Share your macaron creations with us on social media using #MacaronMastery! We can’t wait to see what you create.
Internal Link Suggestion: For more baking tips and recipes, check out our article on “The Ultimate Guide to Baking Cakes” using the anchor text “baking cakes.”
External Link Suggestion: Learn more about the science of macarons at Serious Eats using the anchor text “macaron science.”


0 Comments