
Unleash Creativity: Teaching the Alphabet Through Art
Learning the alphabet is a foundational step in a child’s education, but it doesn’t have to be a rote and repetitive process. By integrating art, we can transform alphabet learning into an engaging, creative, and memorable experience. This article explores various artistic approaches to teaching the alphabet, providing educators and parents with practical ideas, tips, and strategies to foster a love for learning and creativity simultaneously. Get ready to discover how art can make the alphabet come alive!
Why Combine Art and Alphabet Learning?
Integrating art into alphabet instruction offers numerous benefits that extend beyond simple memorization. It taps into different learning styles, boosts engagement, and helps children develop critical thinking and fine motor skills.
- Multi-Sensory Learning: Art engages multiple senses, making learning more immersive and memorable. When children draw, paint, or sculpt letters, they create a stronger connection than just seeing or writing them.
- Enhanced Memory: Visual and kinesthetic experiences enhance memory retention. Creating an artistic representation of a letter helps cement it in a child’s mind.
- Creativity and Imagination: Art fosters creativity and imagination, allowing children to express themselves while learning. This encourages a positive attitude towards learning and exploration.
- Fine Motor Skills: Activities like painting, drawing, and sculpting help develop fine motor skills, which are essential for writing and other tasks.
- Fun and Engagement: Art makes learning fun! Children are more likely to be engaged and motivated when they enjoy the learning process.
- Apple Collage: Provide children with red, green, and brown paper scraps. Have them create an apple collage by tearing and gluing the paper onto an apple-shaped outline.
- Butterfly Finger Painting: Let children use their fingers to paint a butterfly on paper. Encourage them to use different colors and patterns.
- Caterpillar Collage: Provide children with colorful pom-poms or cotton balls. Have them glue these onto a paper to create a caterpillar.
- Dragon Drawing: Guide children in drawing a simple dragon. Encourage them to add details like wings, horns, and fire.
- Elephant Texture Art: Use bubble wrap to create texture on an elephant painting. Paint the bubble wrap and press it onto the paper to create a unique, textured effect.
- Fish Stencil Art: Use a fish-shaped stencil to trace and paint fish onto paper. Experiment with different colors and patterns.
- Grape Collage: Provide children with purple or green tissue paper. Have them crumple the paper into small balls and glue them onto a grape-shaped outline.
- House Drawing: Guide children in drawing a simple house. Encourage them to add details like windows, doors, and a chimney.
- Ice Cream Sprinkle Art: Paint an ice cream cone and scoops on paper. While the paint is still wet, sprinkle glitter or small beads onto the ice cream to create sprinkles.
- Jellyfish Watercolor Resist: Draw a jellyfish with a white crayon on white paper. Then, paint over the paper with watercolors to reveal the jellyfish design.
- Kite Painting: Paint a kite on paper and add a string. Encourage children to use bright colors and patterns.
- Lion Paw Print Art: Dip a child’s hand in paint and press it onto paper to create a lion paw print. Add details like claws with a marker.
- Moon Phases Collage: Create a collage showing the different phases of the moon using different sizes and shapes of white and gray paper.
- Nest Drawing: Guide children in drawing a nest with eggs or baby birds inside.
- Octopus Collage: Provide children with orange paper strips. Have them curl the strips and glue them onto a paper to create octopus tentacles.
- Pig Collage: Provide children with pink paper scraps. Have them tear and glue the paper onto a pig-shaped outline.
- Queen Drawing: Guide children in drawing a queen with a crown and royal attire.
- Rainbow Collage: Provide children with colored paper strips. Have them glue the strips onto a paper in the order of a rainbow.
- Sun Painting: Paint a sun on paper using bright yellow and orange colors.
- Tree Collage: Provide children with green paper scraps. Have them tear and glue the paper onto a tree-shaped outline.
- Umbrella Painting: Paint an umbrella on paper and add raindrops.
- Volcano Eruption Art: Paint a volcano on paper. Then, use baking soda and vinegar to create an eruption effect.
- Wave Collage: Provide children with blue paper scraps. Have them tear and glue the paper onto a paper to create a wave pattern.
- X Marks the Spot: Create a treasure map and mark the location with a big red “X”.
- Yarn Wrapped Letter: Cut out a letter “Y” from cardboard or thick paper. Have children wrap yellow yarn around the letter and secure it with glue.
- Zebra Collage: Provide children with black and white paper strips. Have them glue the strips onto a zebra-shaped outline.
- Prepare the Materials: Gather all the necessary materials before starting the activity. This will help keep children focused and engaged.
- Keep it Simple: Start with simple projects and gradually introduce more complex techniques as children develop their skills.
- Focus on the Process: Emphasize the process of creating art rather than the final product. Encourage experimentation and self-expression.
- Make it Fun: Keep the atmosphere light and fun. Play music, tell stories, and encourage laughter.
- Display the Artwork: Displaying children’s artwork shows that you value their efforts and encourages them to continue creating.
- Adapt to Different Learning Styles: Be mindful of different learning styles. Some children may prefer painting, while others may enjoy sculpting or collage.
- Incorporate Storytelling: Tell stories that incorporate the letters and the art activities. This adds another layer of engagement and learning.
- Use Positive Reinforcement: Praise effort and creativity. Encourage children to share their ideas and explain their artwork.
- Digital Art Apps: Use digital art apps on tablets or computers to create letter-themed artwork.
- Online Tutorials: Watch online tutorials that demonstrate different art techniques.
- Virtual Museum Tours: Take virtual tours of art museums to expose children to different styles and artists.
- Interactive Whiteboards: Use interactive whiteboards to create collaborative art projects.
- Alphabet Learning Games: Utilize alphabet learning apps and games that incorporate art elements.
- Observation: Observe children as they engage in art activities. Note their ability to identify letters and their creative problem-solving skills.
- Artwork Review: Review the artwork to assess alphabet recognition and artistic techniques.
- Verbal Assessment: Ask children to identify the letters they used in their artwork and explain their creative choices.
- Self-Assessment: Encourage children to reflect on their own learning and creativity.
- Portfolio Assessment: Collect artwork samples over time to track progress and growth.
- Books:
- “The Artful Alphabet” by Joanna Wright
- “Alphabet Art: With A-Z Animal Art Projects” by Jill Frankel Hauser
- “My First Book of Patterns” by Kumon Publishing
- Websites:
- Artful Parent (https://artfulparent.com/) – Offers a wealth of art activities for kids.
- Deep Space Sparkle (https://www.deepspacesparkle.com/) – Provides art lesson plans and inspiration for teachers and parents.
- Supplies:
- Crayola Art Supplies (https://www.crayola.com/)
- Melissa & Doug Art Essentials (https://www.melissaanddoug.com/)
By combining art and alphabet learning, you create a holistic educational experience that nurtures both cognitive and creative development. It’s a win-win for everyone involved!
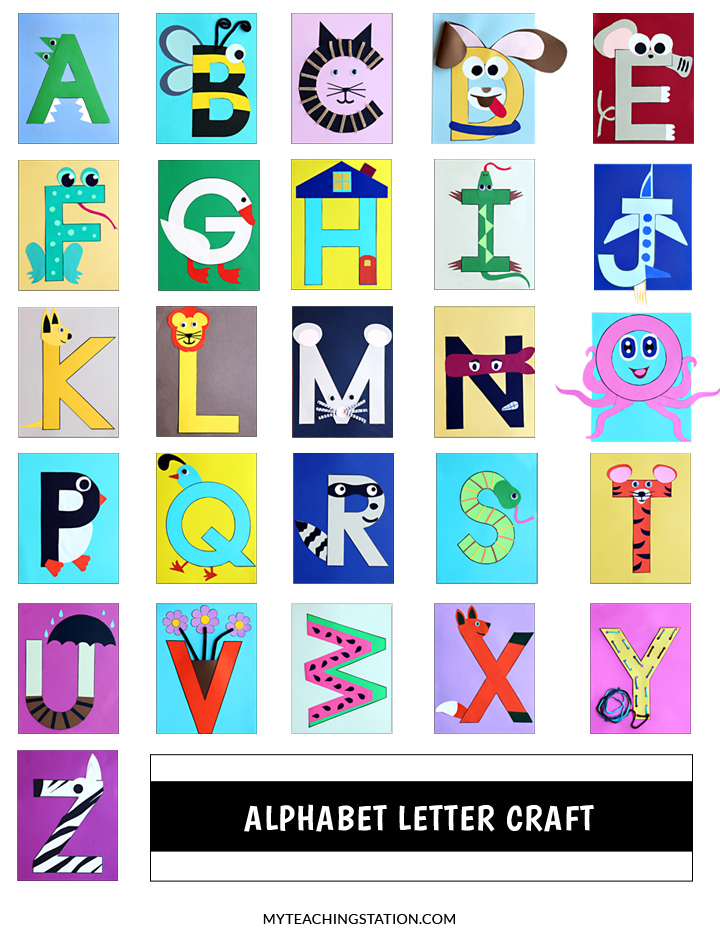
Artistic Activities for Each Letter of the Alphabet
Let’s dive into specific artistic activities that can be used to teach each letter of the alphabet. These ideas are designed to be adaptable, allowing you to tailor them to your child’s or student’s interests and skill levels.
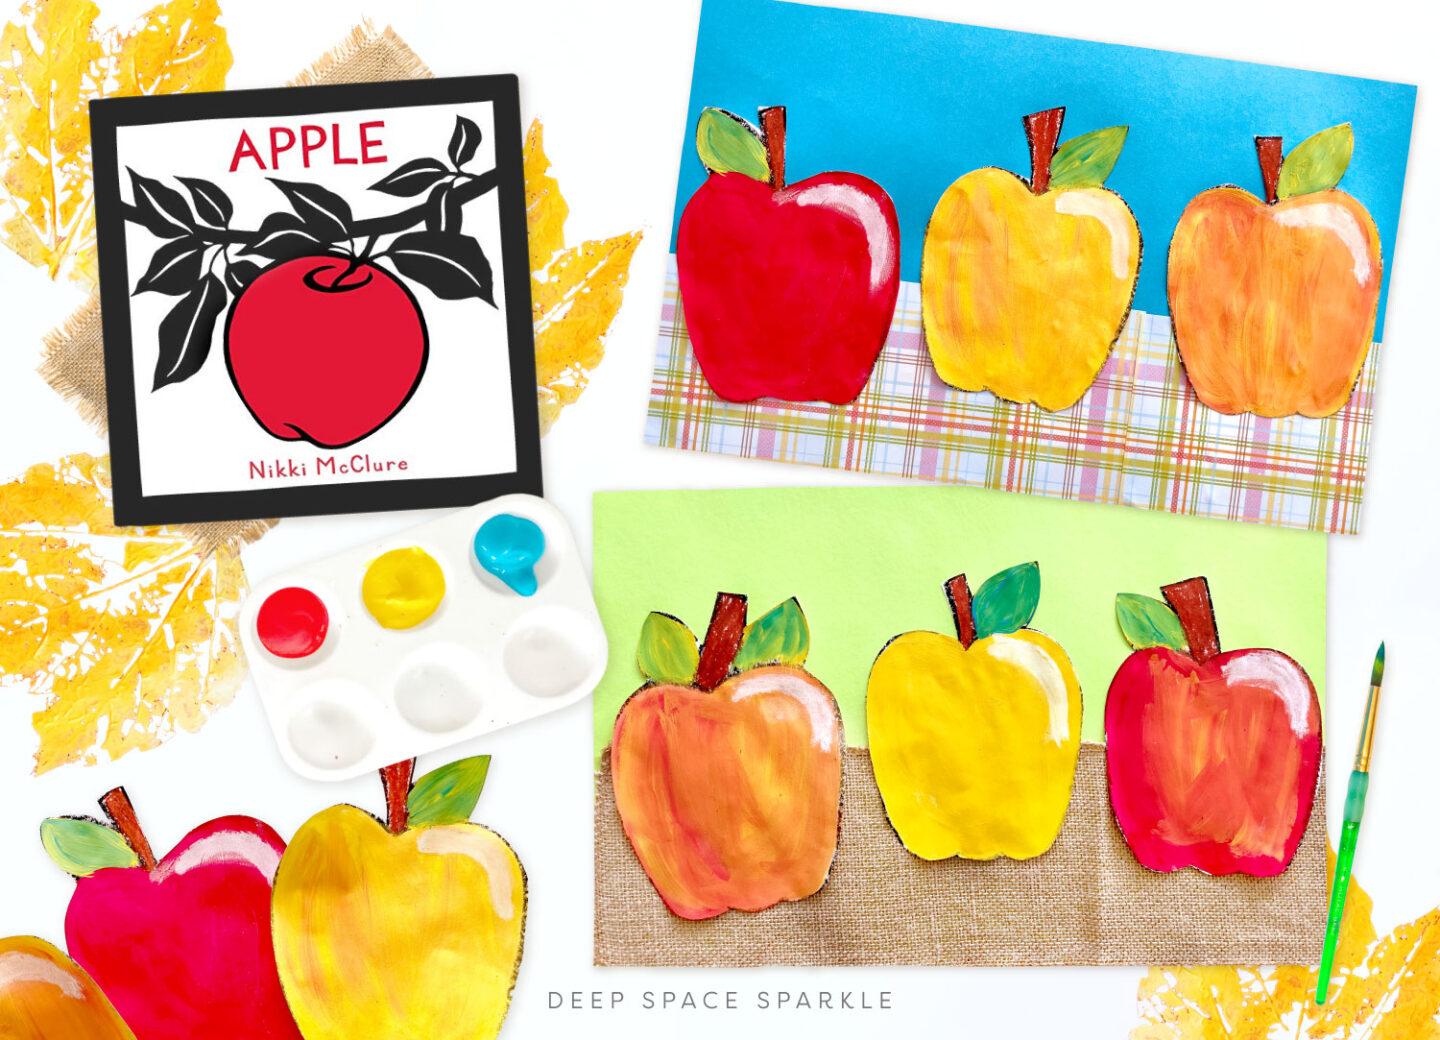
A is for Apple Art
* Apple Prints: Cut an apple in half and use it as a stamp with paint. Create a pattern or a picture using apple prints. This activity introduces the letter “A” and connects it to a familiar object.

B is for Butterfly Painting
* Symmetrical Butterfly: Fold a piece of paper in half. On one side, paint half of a butterfly. Fold the paper again to create a symmetrical butterfly design. This introduces the letter “B” and the concept of symmetry.

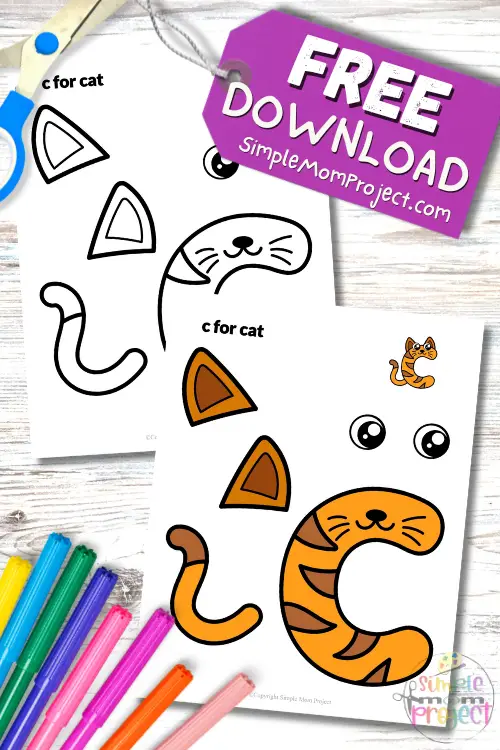
C is for Colorful Caterpillar
* Caterpillar Prints: Use corks or bottle caps to make circular prints on paper, forming a caterpillar shape. Add details like antennae and legs with markers. This activity connects the letter “C” with a fun, wiggly creature.
D is for Dazzling Dragon
* Dragon Scale Art: Cut out a dragon shape from paper. Provide children with colorful tissue paper squares to glue onto the dragon, creating scales. This introduces the letter “D” and encourages creativity in design.
E is for Elegant Elephant
* Elephant Silhouette: Paint a background on paper using watercolors. Once dry, cut out an elephant shape from black paper and glue it onto the background to create a silhouette. This introduces the letter “E” and the concept of silhouettes.
F is for Fantastic Fish
* Fish Scale Collage: Cut out a fish shape from paper. Provide children with sequins or colorful paper circles to glue onto the fish, creating scales. This introduces the letter “F” and encourages fine motor skills.
G is for Glittering Grapes
* Grape Cluster Painting: Use a cork or fingertip to create small purple or green dots on paper, forming a cluster of grapes. Add a stem and leaf with a marker. This activity introduces the letter “G” and practices fine motor skills.
H is for Happy House
* House Shape Collage: Provide children with various shapes of paper (squares, triangles, rectangles). Have them create a house by gluing the shapes together. This introduces the letter “H” and basic geometric shapes.
I is for Ice Cream Delight
* Ice Cream Cone Painting: Use a cone-shaped piece of paper as a template. Paint the cone brown and add colorful scoops of ice cream on top using different colors of paint. This introduces the letter “I” and connects it to a favorite treat.
J is for Jumping Jellyfish
* Jellyfish Tentacle Art: Paint a jellyfish body on paper. Cut strips of colorful paper or yarn and glue them onto the bottom of the jellyfish to create tentacles. This introduces the letter “J” and encourages creativity in texture.
K is for Kite Flying High
* Kite Shape Collage: Provide children with diamond-shaped paper and colorful streamers. Have them create a kite by gluing the streamers onto the diamond. This introduces the letter “K” and basic shapes.
L is for Lovely Lion
* Lion Mane Art: Cut out a lion face from paper. Provide children with yarn or paper strips to glue around the face, creating a mane. This introduces the letter “L” and encourages creativity in texture.
M is for Magical Moon
* Moon Crater Art: Paint a circle on paper to represent the moon. Use a crumpled piece of aluminum foil to dab paint onto the moon, creating craters. This introduces the letter “M” and texture in art.
N is for Nest with Nestlings
* Nest Building: Provide children with twigs, straw, and paper. Have them create a nest by gluing the materials onto a paper plate. Add small paper birds to represent nestlings. This introduces the letter “N” and natural textures.
O is for Orange Octopus
* Octopus Tentacle Painting: Paint an octopus body on paper. Dip a child’s hand in paint and press it around the body to create tentacles. This introduces the letter “O” and handprint art.
P is for Pretty Pig
* Pig Snout Print: Dip a cork in pink paint and press it onto paper to create a pig snout. Add details like eyes and ears with a marker. This introduces the letter “P” and simple printing techniques.
Q is for Queen’s Quilt
* Quilt Square Art: Cut paper into squares. Have children decorate each square with different patterns and colors. Then, glue the squares together to create a quilt pattern. This introduces the letter “Q” and patterns.
R is for Rainbow Radiance
* Rainbow Color Mixing: Provide children with red, yellow, and blue paint. Have them experiment with mixing the colors to create a rainbow. This introduces the letter “R” and color theory.
S is for Smiling Sun
* Sun Ray Art: Cut out a circle from yellow paper. Provide children with strips of yellow and orange paper to glue around the circle, creating sun rays. This introduces the letter “S” and simple shapes.
T is for Tall Tree
* Tree Branch Painting: Collect small branches from outside. Dip the branches in paint and press them onto paper to create a tree trunk and branches. Add leaves with fingerprints. This introduces the letter “T” and natural materials.
U is for Umbrella Up High
* Umbrella Shape Collage: Provide children with various shapes of paper. Have them create an umbrella by gluing the shapes together. This introduces the letter “U” and basic shapes.
V is for Vibrant Volcano
* Volcano Texture Art: Use sand or coffee grounds to create texture on a volcano painting. Glue the materials onto the paper before painting. This introduces the letter “V” and texture in art.
W is for Waving Water
* Watercolor Waves: Use watercolors to create a wavy pattern on paper. Experiment with different shades of blue and green. This introduces the letter “W” and watercolor techniques.
X is for X-ray Vision
* X-ray Hand Art: Draw an outline of a hand on black paper. Use white paint or chalk to draw the bones inside the hand, creating an X-ray effect. This introduces the letter “X” and basic anatomy.
Y is for Yellow Yarn
* Yarn Art: Provide children with yellow yarn and glue. Have them create a picture by gluing the yarn onto paper. This introduces the letter “Y” and texture in art.
Z is for Zigzag Zebra
* Zebra Stripe Painting: Paint a zebra on paper and add black stripes using a brush or marker. This introduces the letter “Z” and patterns.
Tips for Success
To make the most of these art-based alphabet activities, consider the following tips:
Integrating Technology
Technology can enhance art-based alphabet learning. Here are some ideas:
Assessing Learning
Assessing learning in art-based alphabet activities should focus on both alphabet recognition and creative expression. Here are some methods:
Recommended Resources
To further support your efforts in teaching the alphabet through art, consider these resources:
Internal Link Suggestion: For more on early childhood education, read our article on “Effective Strategies for Early Childhood Literacy“.
External Link Suggestion: Explore art education resources at the National Art Education Association (https://www.arteducators.org/).
Conclusion
Teaching the alphabet through art is a rewarding and effective approach that fosters creativity, enhances memory, and makes learning fun. By incorporating the activities and tips outlined in this article, educators and parents can transform alphabet instruction into an engaging and memorable experience. Remember, the goal is not just to teach letters, but to inspire a lifelong love of learning and creativity. So, grab your art supplies, unleash your imagination, and start exploring the alphabet in a whole new way!
Call to Action: Subscribe to our newsletter for more creative teaching tips and exclusive resources! Start your artistic alphabet journey today!

0 Comments